Before you start
Have the customer name, album name, shoot date, expiration date, and a cover photo ready. If the files are already separated into folders such as Ceremony, Portraits, and Reception, use those names for the album events too. Clients will see the same event order.
Files you can add
PixShoot accepts JPEG, PNG, WebP, HEIC/HEIF, common RAW formats, TIFF, BMP, and JFIF. RAW and TIFF originals need a generated browser preview, so they may appear after processing.
1. Start a new album
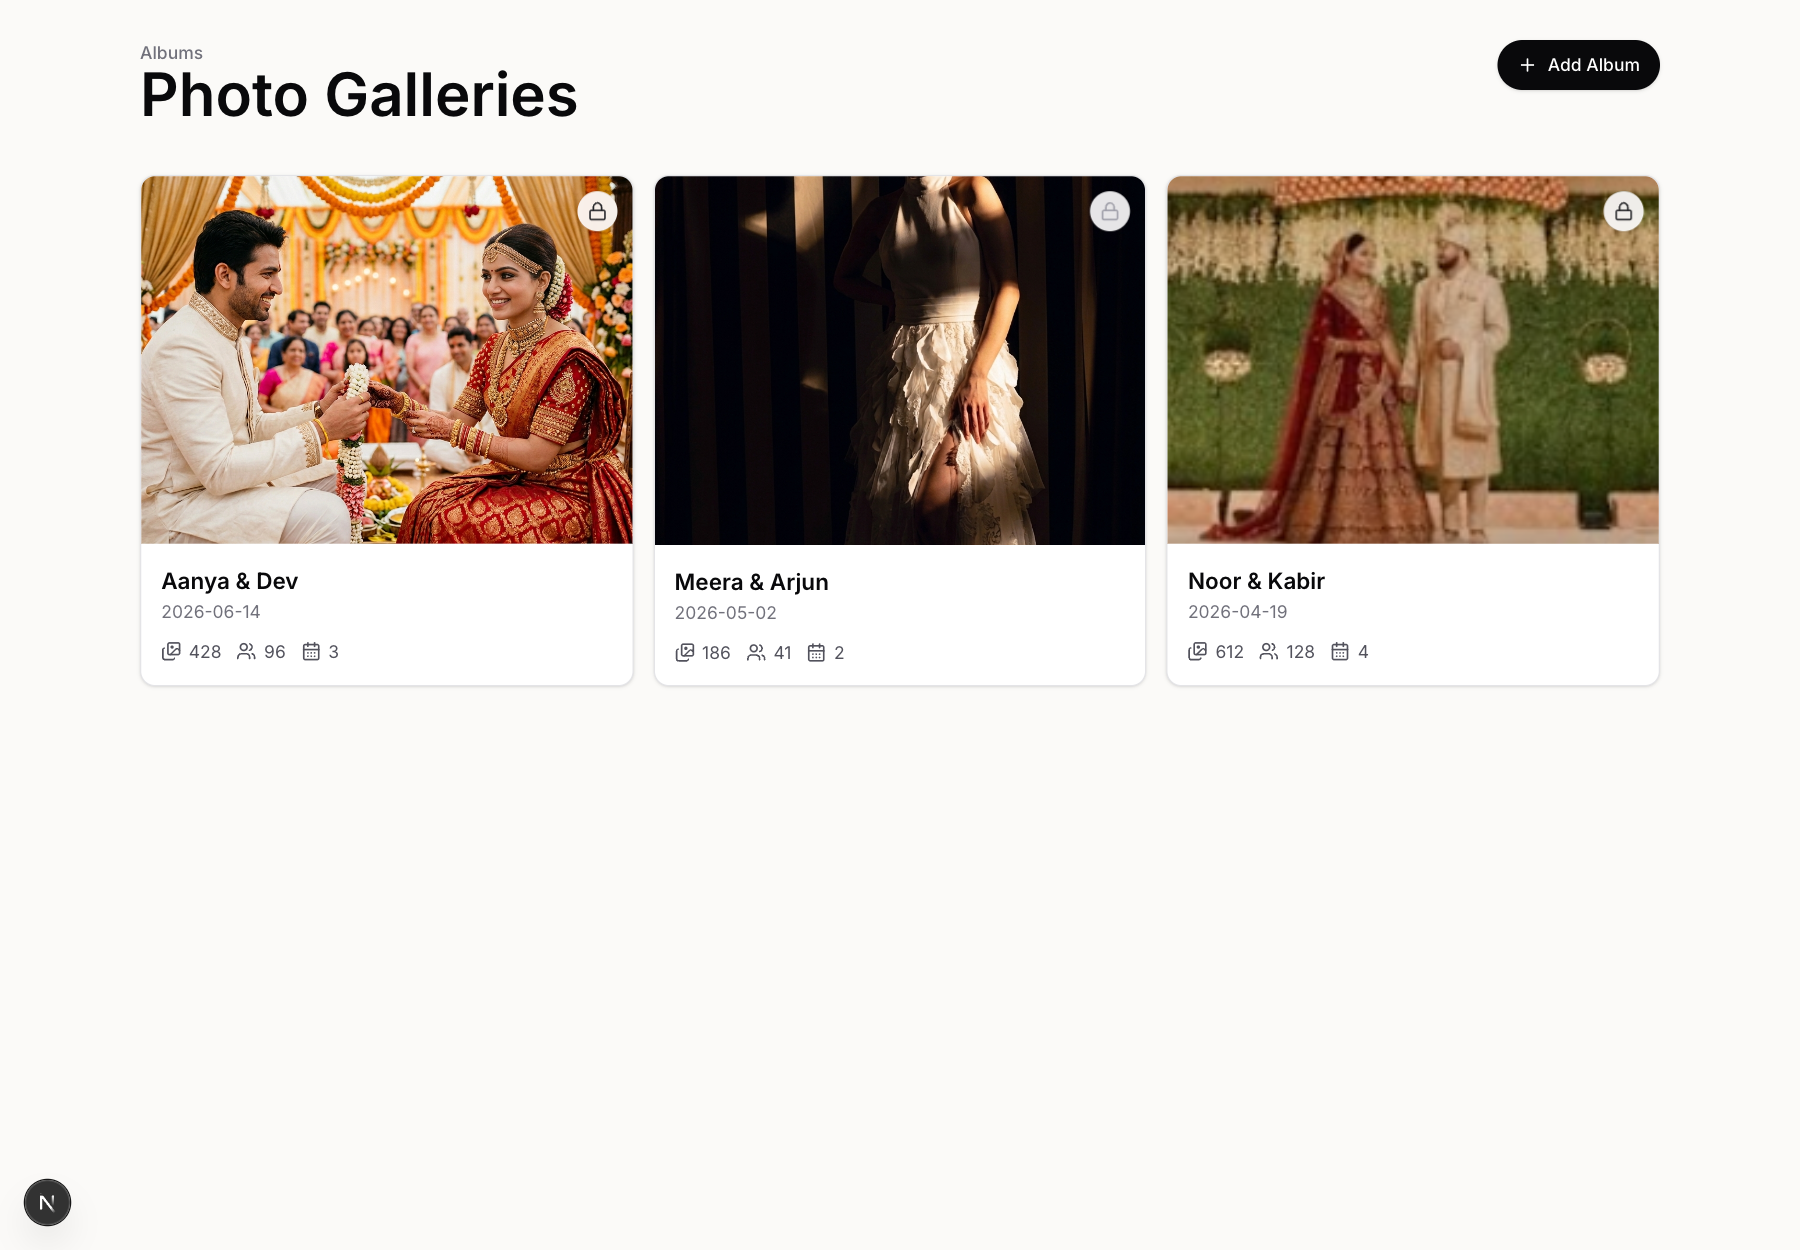
Open Albums, then select Add Album. Existing albums stay on this page with their photo, people, and event counts.
2. Add the album details
Enter the album name and a short description, then add a cover. The customer field accepts an existing customer or creates the customer with the album. Choose a shoot date and the date when the client gallery should stop showing.
The album remains visible to studio admins after it expires. The client-facing gallery does not.

3. Set up events
Events are the tabs inside a gallery. Keep their names short and recognizable. Add or remove rows on the setup screen, then select Create Album. You can edit events later from the gallery toolbar.
4. Upload the media
On the Add Media screen, choose whether the files belong to an existing event or a new one. Confirm the destination before picking files. This prevents a large batch from landing in the wrong part of the gallery.
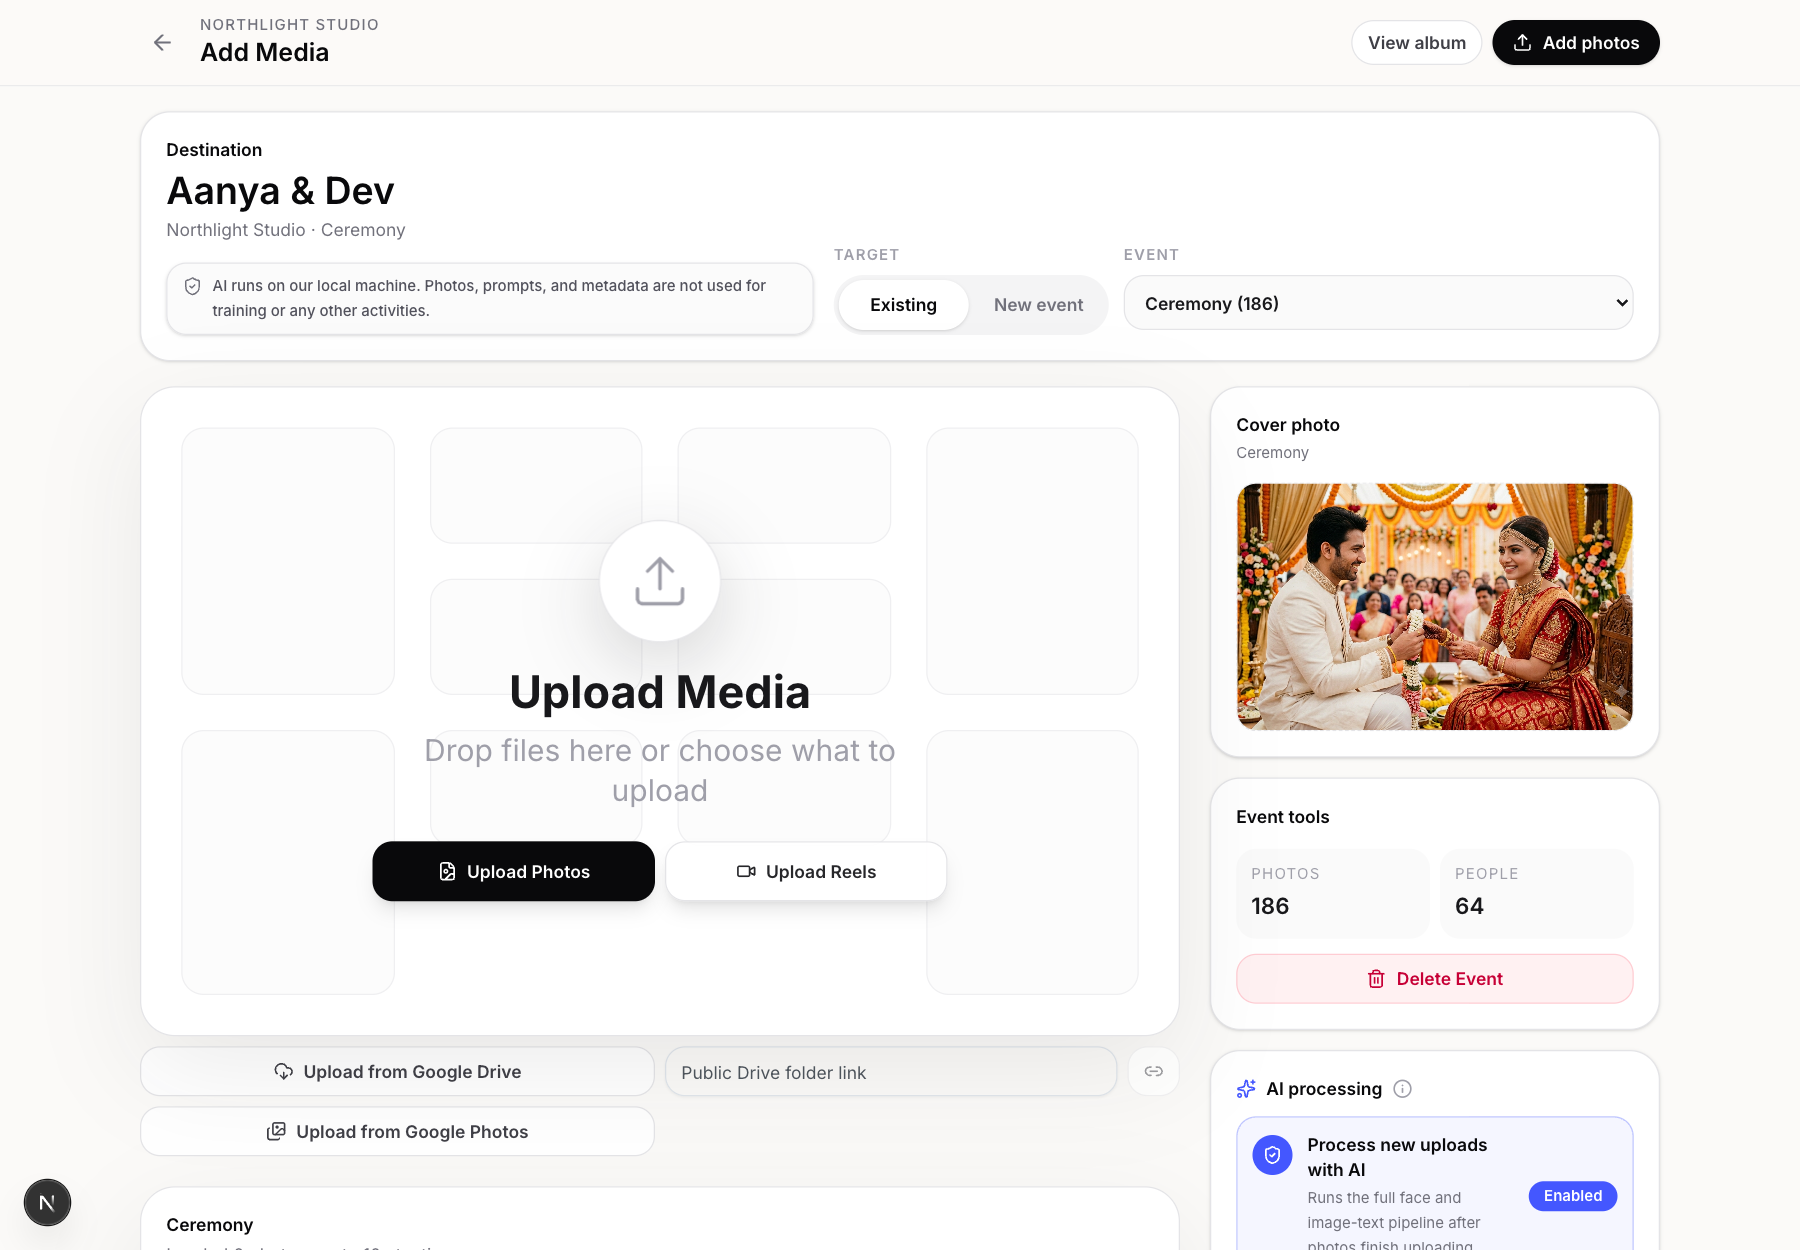
Drop files into the upload area, select photos or reels from the device, or import from Google Drive or Google Photos. The header button adds more photos to the same destination.
5. Check processing
Keep the page open until the file transfer finishes. Browser-ready previews, thumbnails, face groups, search text, and review signals can continue processing afterward. The AI switch applies the full pipeline to the new photos; turn it off when you only need delivery files.
- A ready preview means the photo can display in the gallery.
- Missing people or search results usually mean AI processing is still running.
- A failed item can be retried without uploading the successful files again.
6. Organize and review
The gallery toolbar keeps the main jobs in one place. Filter by a person, switch events, select photos, add media, run AI Review, open videos, or build a collage. Use the search button for a visual description such as "couple portraits at sunset."
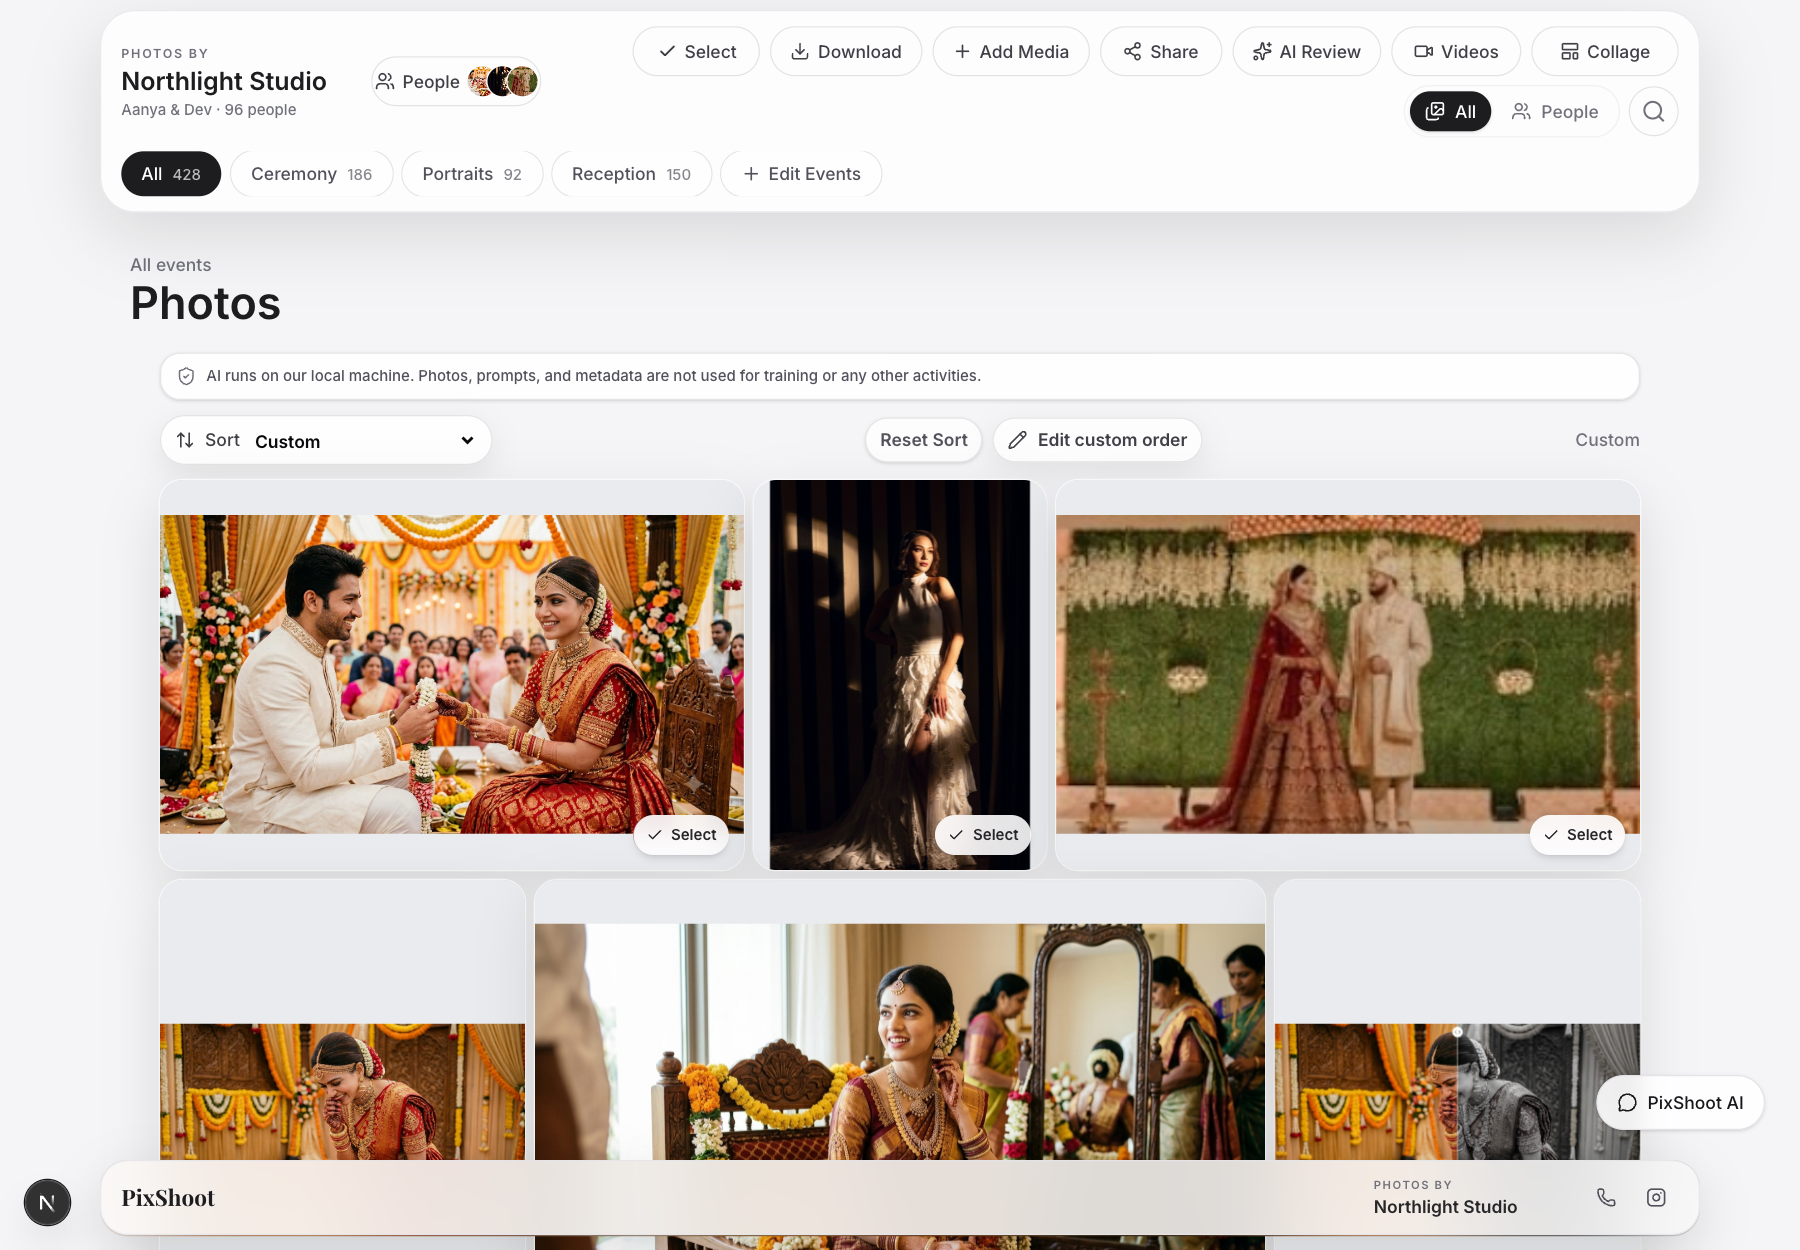
Below the toolbar, choose a sort mode or edit the custom order. Event tabs show their photo counts. Select photos before moving, downloading, or applying a preset to a group.
7. Set access and share
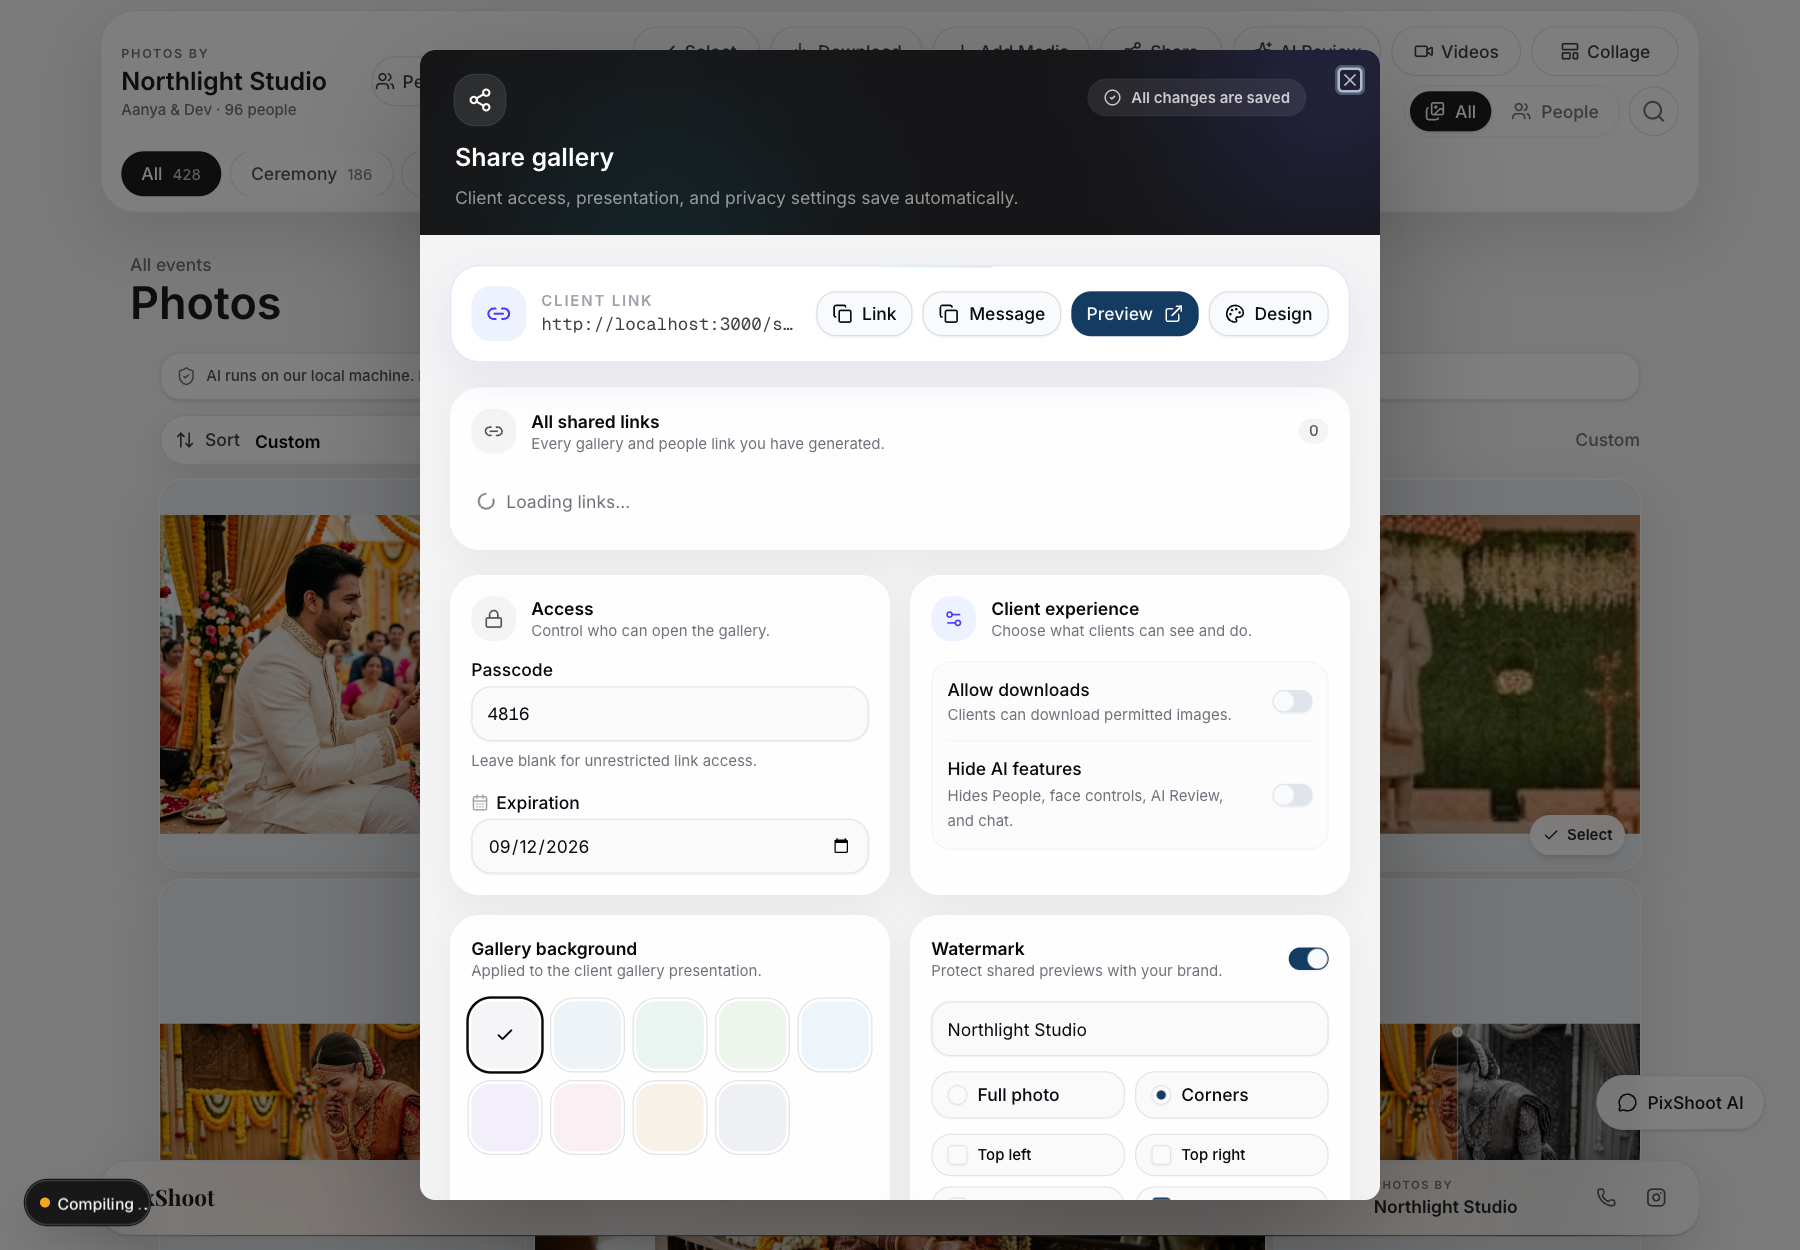
Select Share in the gallery toolbar. Set the passcode and expiration first. Then decide whether clients can download files, whether AI features appear, and whether shared previews need a watermark. These settings save automatically.
Use the narrowest link that works
Send the full gallery to the main client. For a guest who should only see photos containing them, choose the person in the gallery and create a person-specific link instead.
8. Check the client view
Open Preview from the Share dialog, then open the exact copied URL in a private browser window. Check the cover, album title, event order, visible photo count, passcode, watermark, and download button. A signed-in admin session can hide access problems that a client would see.
Gallery ready
Keep the delivery link with the job record
Save the client URL and its expiration date wherever the studio tracks the job. If access changes later, reopen Share and update the same gallery instead of sending an untracked replacement link.
Open albums